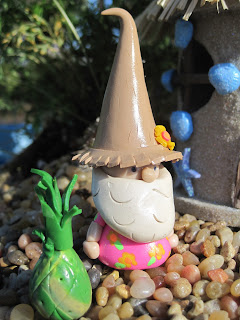
Monday, January 14, 2013

NEW! LIGHTS in all houses!

Now there are tiny gnomes and fairies at home in my cottages. I have added lights. A waterproof amber LED tealight is inserted through a hole drilled in the floor. It uses 2 lithium 3 V batteries, which are included. The manufacturer says they have 12-16 hours of power. 
 Here is the tealight outside the house. It requires a 1 1/4" hole in the floor. They are waterproof, and turn on by twisting.
 I can just imagine Mr. and Mrs. Gnome warming their feet by the wood stove and enjoying a tiny mug of hot cocoa.
All my cottage designs now include lights, even though I don't have them photographed that way yet. The price is $2 more...$37- $39.

Sunday, January 6, 2013

Tropical Island Fairy Garden

Finally, the weather is nice enough to go outside and build my tropical island fairy garden! I use a large stainless steel mixing bowl from the kitchen supply store. You can get them other places, but they are far cheaper there. My husband drills a small hole in the bottom for me. Then I spray paint the inside and outside. I used a mix of three blues to get an ocean feel here.
The next day, I gather my supplies; potting soil, styrofoam packing peanuts, blue aquarium gravel, natural aquarium gravel, plants, gloves, shovel, and decorations!
I like to use the styrofoam packing peanuts to fill in the bottom instead of rocks or gravel because they are so much lighter.
 On top of those goes the potting soil. Make sure to leave plenty of room for your gravel!
 This looks about right!

 Now I make holes for the plants and plant them. They are a little off center because I want them on the island, but with enough room on one side for the house. I decided to use a rabbit's foot fern and a dracaena because they look sort of tropical, but I think, are easy to care for. I am definitely no expert on houseplants!
 Pat the soil down around the plants with a slight mound in the middle.
 Then I water it thoroughly and let it drain for awhile before the next step.
Now I put the plain gravel in. I decided to use gravel instead of sand because I have found through experience that the sand tends to mix with the potting soil. I'm afraid it would mix with the blue gravel as well. So, this is a rocky island.
 
 Again, make a mound in the middle.

Now it's time for the ocean! I found this beautiful mixed blues gravel at the pet store. That's also where I get my natural color gravel. It's so much nicer then what you find at the hardware store. Pour it in a ring around the outside.


It's beautiful already!
I added a little more natural gravel to the center.


 Then I get to decorate. First the beach hut, then two beachcombing gnomes. One has a pineapple and the other has a surfboard. I found this little bamboo statue at the pet store when I got the gravel. It's actually for an aquarium, but the aquarium aisle is full of cool stuff that is perfect for fairy gardens! And finally, a couple of tikis!


 Aloha!

Friday, January 4, 2013

Here comes the bride!

A customer that bought some gnomes mentioned that she had made a wedding themed fairy garden as a wedding gift, and I thought, "Of course! Bride and groom gnomes. How obvious!" So I started making them the very next day. I thought I'd take some photos of the process to show you. I work on a piece of marble tile I got at the hardware store. First I condition the clay by kneading it till its nice and stretchy and smooth. (Sometimes I can get my husband to help me with this part.) Then I weigh out pieces for the heads, bodies, hats, and beards. I use a small kitchen scale. The bodies and hats are 6 grams each, and the heads and beards are 3 grams each. This gives me a standard size.

 I have a small manual pasta machine that I use to roll out the clay for flat things like clothes.
 See that round silver thing on the right? My husband built it to my specifications for my gnomes. He drilled holes in it for the toothpick to stick down through from the base of the gnome. Then I put the whole thing in my portable convection oven. (I love that thing!) I keep it out in the garage because baking polymer clay does smell a bit. That little pink piece of paper in the picture below is my template for the lady gnome's hair. I make paper templates for everything to save myself a lot of time and stress, and to make everything standardized.

 Here they are, ready to go in the oven. I bake gnomes at 275 degrees for 45 minutes. You can't really see it in the picture, but when I am going to put a ribbon on her hat, I stick a tiny jewelry finding with an eye on it into the tip of her hat. I don't know what it's called. It looks like a pin, but with an eye instead of a head.
 After baking, I use Mod Podge to glue on the glitter, paint her cheeks pink, and glue on the rhinestone.
 I don't make them until they are ordered, so I can customize as much as you want! It's actually more fun for me to do so.